Tag Archives: Try This

An ideal 20 minute workout for the mind and body

Only have 20 minutes for a quick workout? Keep it interesting and effective by incorporating several types of movements done with a focus on precision . Below is one suggested program. (Psst. Always consult a professional trainer, or your doctor before embarking on a new workout regime.)

5 MINUTES An intense cardio boost ( jump rope (my favorite), sprints, jumping jacks, burpees, etc)

8 MINUTES Pilates/Yoga – or a combination of moves that stretch and strengthen the body ( Good selective Pilates moves include: “Roll Ups” “The 5’s series”,  “Swan” or back extensions, lying side legs, and “Teasers”).

5 MINUTES Traditional strength training (pull ups, chin ups, push ups, dips, and/or planks – forearm planks for weak core and wrists) Builds much needed strength for neck, shoulder, and back tension.

2 MINUTES Deep breathing to bring you back to a calm, relaxed and refreshed center.

It’s always good to mix it up. Extend one part of the routine for another after a few weeks to keep your muscles from settling into movement habits. And work with a professional instructor every now and then to get the most out of those 20 minutes. Every body is unique and has its own strengths and weaknesses.

Enjoy every minute!


Fun toys to get you outside this summer

Summer is officially here. It’s time for pedicures, beefing-up on barbecue skills, and generally doing anything that calls us out into the fresh air and sun. It is the best time to take fitness outdoors too, and I don’t mean lugging the treadmill out of the backroom to the porch. In case you forgot, there’s no age limit on playing outside.  Bikes, roller skates, skateboards, and jump ropes are great go-to summer toys, but here are a few other fun outdoor ideas you might have forgotten:

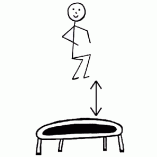
Trampolines

My parents claimed this was the best investment they ever bought our family. We used it regularly, every summer, for 15 years, with lots of giggling, lots of exercise, and luckily, no broken bones.

Kites

Kites are beautiful, artistic, and fun to run around with in the hopes of setting aloft. Make it a DIY party and gather some friends, craft your own, and have a kite-flying contest. Here’s a cool do-it-yourself kite from Popular Mechanics.

Water Guns – or better yet, Water Balloons!

Personal politics about warfare and guns aside, this is a great way to cool down and laugh when it’s hot. Play capture the flag with teams of friends. Or have a little one-on-one couples therapy. Loser makes dinner.

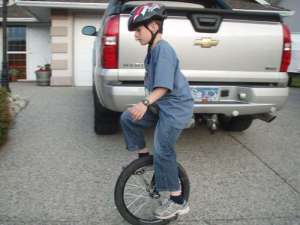
Unicycle

Not only a mode of transportation, it’s a great way to work on balance skills and impress friends. When starting out, a good spot goes a long way. Be patient and you’ll soon be speed cycling with the best single wheelers out there.

Pedalo

A wooden German toy that’s been around for decades, it’s a slightly safer variation on the unicycle. The pedalo builds balance and body awareness. Preparing you to be a natural on the…

Tight rope

Go to the local hardware store and get a strong, thick rope. Tether it, securely to 2 points, starting at just a few inches to a foot off of the ground.  Have tight rope walking competitions. See who can balance the longest, walk forward and backward, maybe even jump up and down. If you’re an adult at a barbecue with friends, watch out for “beer confidence”. No sprained ankles, please.

Retro Toys – Pogo Sticks, hula hoops, and Slip n’ Slide?

These were all popular for good reasons…except maybe slip n slide, with personal memories of grass stains and elbows burns. A lot of the flash back toys are silly mayhem for adults and kids alike. As a parent, you might be able to show off your impressive muscle memory skills to the young ones.

What are your favorite outdoor toys? Send us your ideas!

How to get skinnier right now.

From SF Chronicle/ photo by Kate Wade

Did you know you could lose inches just by standing and sitting up taller?

Practicing better posture not only lends to a leaner more confident looking you, but it also works and stretches the muscles into longer habits. Look at the way a dancer walks. They constantly train their muscles to lift and project outwards – stretching away from themselves, rather than curling inward.

I have personally seen Pilates clients who “looked” as though they lost as much as five to ten pounds after just a few sessions, because they were able to support better posture.

Apart from being visually slimming and confidence improving, good posture lends to overall better health. According to the Mayo clinic website, your Mother was right all along to nag about sitting up straight :  Your spine is strong and stable when you practice healthy posture. But when you stoop or slouch, your muscles and ligaments struggle to keep you balanced — which can lead to fatigue, back pain, headaches and other problems.

To trim your waist, neckline, and entire body right now, imagine a huge helium balloon attached by a string to the top of your head, gently but constantly lifting your spine away from the ground, or your seat.

Your 5 minute workout at work starts NOW

Let’s get straight to the point:

You sit too much. You are supposed to get up regularly. You are supposed to move around. You’ve just stumbled upon your chance. It takes 5 minutes. Considering how much time gets sucked into computer zombieland, it’s a small amount to ask. Here we go…

#1. Knee lifts while sitting

Knee lifts and holds, while sitting up straight

Sit up as tall as you can, arms by your sides. Scoop the abdominals in towards the spine to help you gain supported lift. Lift the right knee, pushing the left foot firmly into the floor. Balance and hold 10 seconds and switch. Do 3 sets. Pay particular attention to your hips and pelvis. No shifting your weight from one hip to the other. Keep them evenly weighted. If the right knee is up make sure the right hip is firmly planted and vice versa. No slumping or rounding the back. Sit up tall! Trying this on a balance ball later gives you more feedback.

DON'T DO THIS! No slumping or rounding of the upper or lower back.

#2. Chair dips

Chair dips, option 1. Bend and straighten the arms, keeping shoulders broad and away from your ears. Draw belly into spine.

2 options: hands on your chair handles (easier) or hand on the seat (harder). 10 dips, bending the elbows as far as you can and then straighten the arms. Your body weight is supported by your legs and feet as you move. Keep the spine straight, belly scooped and neck stretching long. Most important, keep the shoulders down away from your ears. This provides more arm work and a chest stretch.

Chair dips, option 2. This one is more challenging. Squeeze legs together, belly in, and shoulders broad.

#3. Balance on one foot

Stand up. If you have heels on, slip them off. (What’s one minute? Your feet will thank you). Standing on one foot with abdominals scooped and posture lifted, hold for 30 seconds. Switch.

Balance on one foot while standing as tall as you can. Opposite knee is high off the ground. Try for 30 seconds to one minute.

#4. Knee bend/Arm swings

Bend the knees and swing the arms across the body, exhale.

Straighten back up, stretching the body back up towards the sky. Swing the arms out and up. Deep inhale.

This one is akin to Radio Taiso, the Japanese morning workout. It should be invigorating and full of movement. Separate the feet shoulder width apart. Bend the knees and swing the arms across the body. Straighten the legs, lifting up through the spine and swing the arms up and out to the sides in a big stretch. This exercises needs a swinging rhythm and momentum. Take deep breaths as you move. 10 times.

#5. Elbow circles

Elbow circles

Sit back down. Gently touch fingertips to shoulders. Reach outward to opposite walls through your elbows. Draw large smooth circles in space with the elbows. Take Deep Breaths. Keep you head floating up towards the ceiling. Keep your head lifted and smile.

A clearer visual of elbow circles

That’s it!  5 minutes (maybe less). Now back to work. …Or, maybe it’s time for lunch.

What it means to scoop the abdominals

Wrong kind of scoop

You are in a Pilates class and the instructor says. “scoop your belly!”, do you:

A. Think, “What the heck does that mean?! I can’t scoop anything.

B. Suck in your gut, and hold your breath.

C. Give up on this weird Pilates stuff and take kickboxing next week instead.

This “scoop” is not only an essential part of traditional Pilates, but a fundamental muscular awareness for all types of sports and activities, including sitting at your desk.

To scoop the abdominals one must engage their transverse abdominal muscle, often referred to by movement therapists as the TVA. This is the deepest abdominal muscle. When engaged the TVA muscle contracts like a corset around the waist. It supports the pelvis and spine creating the “pulled-in” look.

The Transverse is like a corset, pulling the waist in

Too often I meet people who exercise, but still complain of belly bulge and back pain. While chasing the perfect “6-pack”, we focus on building the top abdominal layer – the rectus abdominal muscle. Although feeling the burn of this outer layer of muscle, if you are unable to engage deeper muscle support the back moves unsupported, and the belly pushes out…and you are actually a few steps further from a 6-pack, than when you started.

A 6-pack cannot exist on one muscle alone, it takes the whole body. The TVA  is just one of many muscles that makes up the core, however it is the muscle that creates the scoop.

Here are a few suggestions to help you master your scoop:

Belly in/Belly Out Quadruped

Step 1. Allow belly and organs to drape towards the floor. Keep the spine straight and still. No arching

Step 2. Draw the belly and organs in and up towards the spine. Again, don't move the spine. It remains planked.

On all fours (if it bothers your wrist, a forearm position is fine) Plank the spine. Do not allow the back to sag or round. Holding this table position, allow the belly muscles to relax towards the floor. AGAIN,  no spine movement, only the belly. Exhale and draw the belly muscles in and up towards the chest – like you are scooping your guts up and into the back of the ribcage. Hold this scoop for 3 breaths and then allow the belly to release down towards the floor again, maintaining a flat spine. Try this 5 – 10 times.

Leg extension Quadruped for Core

Add a leg extension for a more difficult core challenge

Once you feel the scoop,  try maintaining it while sliding one leg back and stretching it out. Hold this position for three breaths, while keeping the spine planked (no sagging back). Hold 5-10 seconds. Switch legs. Press into all the finger joints to help lift out of the wrists. Can also be done on fists or the forarms. Try doing 5 sets.

Deep belly sitting

Practice scooping while sitting at your desk

This one can be done sitting at home, at your desk, or at the opera. No one will know you are working out, but they might comment on your good posture.

Sit up tall, and imagine vacuuming in the abdominal wall. Hold while taking 3 gentle breaths. Release.

The vacuuming feeling is akin to a pair of tight pants as you pull up the last bit of the tight zipper. That is your TVA. Another image is if someone were to give you an upper cut to the belly button, punching in and hooking up…not a pleasant thought, but it works.

Scooping pulls in and up - like an upper cut to the belly. ewww

You never want to overwork just one muscle. It takes a coordinated effort from all muscles to keep the body balanced and strong. There is some debate over what the TVA does and how important it is to work. No matter, the awareness of the muscle is extremely valuable to a better understanding of yourself and how you move.

Practice!

Four exercises in under 10 minutes to firm your core

How fit is your center?

It’s not about how many crunches you can do. Did you know if you overwork your abs, you could end up with back pain and no flatter a front? Your center is not just the muscles you look down at and sigh, but your whole trunk: front, back, sides, top and bottom. A fine balance in all of these muscles is necessary for a strong core.

Here’s a simple test to determine how you measure up:  Hold a forearm plank as long as you can. 1 minute is good. 2 minutes is excellent. Less than 1 minute? We have some work to do.

During the above test, really pay attention to what you are feeling. These feelings speak volumes about what and where you are weak, strong, tense, etc.

Do you feel your low back? Then your abdominals and deeper core muscles are not lifting to support your trunk and they need to be strengthened.

Do you feel your neck tension or elbow pressure? Then you upper core muscles, like the lattisimus dorsi,  (ie the muscles that push your armpits down towards your hips) need to be strengthened.

What’s your body telling you? Different pains and strains mean different muscles are out of balance. Tuning into your body and developing the awareness of what is being felt is the first big step to finding core balance and strength.

To build overall trunk strength, try this simple core challenge.

Performing these exercises at least 5 days a week. It should take less than 10 minutes. Even after a few weeks, you will feel the difference:

#1. THE FOREARM PLANK

Up to 2 minutes. Pinch glut muscle together. Lift abdominals up towards the spine. Keep your neck long (front and back), and maintain an open chest, with the collar bones trying to peek out.  Balance forearms on a stability ball to mix up the challenge. Starting on the knees is a-ok!

#2. SIDE FOREARM PLANK:

1 minute each side. Keep hips lifted. Belly pulled in (tighten the waist muscles all around like a corset), and chest stretched open.

#3. BACK EXTENSIONS: Keeping hips and top of thighs on the floor. Hands under armpits. Press into palms and lengthen chest and back up and out, away from legs. No pinching in the low back  nor strain in the neck allowed. If you feel this, angle your arch less.

#4. BIRD DOG:

On hands and knees, scoop the abdominals up and in towards the spine. (Think of putting on a tight pair of pants, trying to get the last bit of zipper up).  Extend the opposite arm and leg away from the contracted center.  If both arm and leg together is too hard to balance, start with extending just the legs. Hold the extended position for 10 seconds then switch sides. 5 -10 sets.

That’s it. Start simple and slow. 4 exercises. Less than 10 minutes a day. 5 days a week.  It will make a noticeable  difference within a few weeks, and who knows…maybe those 10 minutes will inspire you to add more activity throughout the day. Good luck!


New Pilates Classes/Core Conditioning in St Louis

Bumbershoot Aerial Arts (2200 Gravois Avenue, 63104) is an aerial and circus arts school close to downtown St. Louis where people can discover their inner monkey. There are few places like it.

Core conditioning and awareness of movement are important building blocks to gaining strength and staying safe in the air. It’s one thing to climb a rope, and another to know how you got there.

To aid in your circus skills, or to just gain strength for everyday life on the ground, Pilates mat classes, private training on Pilates equipment, and aerial conditioning classes are now offered at Bumbershoot.

It’s the only classical Pilates classes near downtown and the only colorful studio space like it around!

Bumbershoot Pilates Classes – Fall 2010

INTERMEDIATE PILATES MAT Tuesdays  and Thursdays  at 6pm

A faster paced, classical Pilates mat class, with emphasis on flowing movements outward from a strong core.  Advanced exercises are explored. Previous Pilates experience or instructor approval required. Knowledge of proper modification for your body is required. 55 minutes

BEGINNER MAT Saturdays 10 am

Kick off your Saturday morning with a stronger core! This Pilates mat class is open to all and focuses on fundamentals and beginner classical mat. Learn how to simultaneously stretch and strengthen your muscles. Gardening, sports, and even trapeze become much easier with a stronger center. 55 minutes

Joseph Pilates partaking in fitness fun

Private and small group instruction by appointment. For information on these classes and instructor Stephanie Ellison, please click on the classes and instruction page here.


Presidential Fitness – Claim your Award

TO BE FIT

Ah, the joys of doing the presidential fitness test in junior high. As if we all weren’t awkward enough, mix in memories of bad P.E. classes and…well, not a lot springs to mind because I blocked them out. I do remember the mottled red t-shirt and ill-fitting, infinitely uncomfortable polyester shorts.

Looking back, it’s such a wonder why the education system can’t make physical education more adventurous and pertinent. Light anatomy, injury prevention and creative exploration of personal activity goals, could help stave off the obesity epidemic and stress levels, in part.  But this is a topic for another day. I digress.

While you don’t have to don the old itchy shorts, you can redeem your junior high years by taking the presidential ADULT fitness test. Yes, this test does keep following you. At least you don’t have to perform it in front of the school jocks. Trying this with a friend could make for a fun-filled hour of laughter… at each other. The test is filled with oldies but goodies observing general flexibility, endurance, strength, and aerobic fitness. Here it is, in brief:

  • Timed 1 mile walk
  • How many push ups can you do in 1 minute?
  • How many half sit ups (or chest curls) can you do in 1 minute?
  • Sit and Reach: Sitting on the floor, legs stretched out, belly scooped in, how far can you slide your hands along the floor?

Big fun, right? Sometimes, we have to start somewhere, and this isn’t a bad place to begin. Again, a partner in crime makes this more palatable and fun-ny.

I know. What you really want is an award – specifically from the President that says, “You made it. Go you!” Your prayers have been answered. The President is offering a Presidential Active Lifestyle Award, or PALA, for those of us who can’t live without acronyms.

The program has promise. It’s a simple, realistic, attainable goal – 30 minutes of activity, 5 days a week, for 6 out of 8 weeks. Done. Award please. It doesn’t have to be 30 consecutive minutes. Spread it out throughout the day. Taking the stairs at work, counts. Walking the distance of the parking lot, counts. Every little bit adds up.

Did I mention the award looks pretty official? You could place it on the mantel next to your child’s, or your own childhood, trophies.

You can even up the ante with the Presidential Champions Challenge, building on more activity to earn points towards supremely awesome medals: 40,000 points for bronze, 90,000 for silver, 160,000 for gold, and a whopping 1 million for platinum. I’d be sure to wear it around my neck at all times, if I were you.

Once moderate movement sets in, don’t be surprised at how steadily you feel better. It doesn’t take much and it works! I move to become adults in revolt, in the name of reclaiming our presidential fitness award. If you complete it, send me your photo with your award and we will post them. Just remember, 30 minutes of activity, 5 days a week, 6 out of 8 weeks. Good luck. See you on the other side.

You are really getting on my Sciatic Nerve.

Does your back make you feel like this?

Back pain universally blows. It destroys postures, mental states, and days all around the world.

Sciatica is a subset of back pain mostly felt in the legs. The sciatic nerve is a long nerve that goes through the spine, separating down into the legs and ending in the feet.  Sciatica often occurs when something close to the sciatic nerve impinges upon it. The muscles around the nerve, in an attempt to protect it, seize up causing sharp, shooting pain or numbness through the buttocks and the back of the leg. Muscle atrophy can result from the stress of seizing up.

The sciatic nerve

Sciatica and back pain can attack anyone at anytime. A young athletic person with muscular imbalances is as likely to feel back pain as an older person with a sedentary lifestyle.

If ignored, sciatica and back pain often gets worse. With an acute onset of sciatica at 25, I know. Without proper care, I was forced to lay on the floor for a week, unable to sit or stand for long. My leg would buckle underneath me, and even as the pain lessened, I could barely stand for more than an hour or two at a time. It took a year of constant work to become pain free. That year was crucial for understanding how to care my body and preventing back problems for years to come.

Every body is different. Back problems are relative to the individual. Proper core strength, self-knowledge and self-care are golden tickets to recovery.

Below are suggestions to help ease sciatica, but always consult your physician regarding any prolonged back pain.

#1. R-I-C-E – It’s the physical therapy stand-by for acute pain. Practiced everywhere from the school nurse’s office to NBA courts.

REST– After an acute back injury, rest is the best medicine. Allow the spine and muscles to relax and to heal on their own terms. Listen to your body.

ICE– When in doubt, go with ice to help relieve inflammation and numb the pain. My favorite ice pack is a super large bag of corn or peas from the grocer, just don’t eat it later.

COMPRESSION– Wearing a back brace or wrapping an ace bandage in a corset-like fashion can temporarily aid in supporting the spine and muscle strain.

ELEVATION – Rest flat on the back, allowing the legs to be propped up at an ELEVATED angle. Either with a pillow below the knees or lying on the floor with calves draped on the couch or a chair.

#2. Stretch out the spasm.

Stretching out cramping muscles provides temporary relief. Proper stretching is crucial. Do not stretch the leg past a 90 degree angle, causing the low back to curl forward or twist. While this might feel good at the time, it can make the pain worse later by straining the low back.  Keep the spine neutral while stretching the legs. Again, when stretching the leg do not allow the low back to round or tuck under.

hamstring stretch. turn the leg in and out

Piriformis stretch: This stretch releases the muscle spasm temporarily around part of the sciatic nerve.  Lie on your back. Cross one foot over the opposite thigh. Pull the thigh in towards your chest. It’s very important to keep your tailbone on the floor (do not allow it to curl up off the floor).

Piriformis stretch

#3. Build a better core

Begin to work on slow, controlled movements that allow you to find your core muscles. No crunches or sit ups. Without proper awareness these movement can create further muscular imbalance and continued back pain. I recommend trying the dead bug exercise, which is explained here.

dead bug exercise

#4. McKenzie Exercises

Physical therapists either approve or condemn this method. There seems to be no in between. After 6 months of pain, the McKenzie extension exercises helped my own pain and strengthen my back muscles.

Named after a physical therapist in New Zealand, McKenzie exercises are primarily extension (arching) exercises that could help reduce the symptoms of herniated disc by reducing pressure on a nerve root. For acute pain, the McKenzie exercises should be done frequently, at least once every two hours. For more information, you can buy the book, or check out their website. Although many back and sciatica problems could be helped by these exercises, it is not for everybody. Consult a therapist or a doctor to determine if this method is for you.

#5. Get moving with strength and balance

Once back pain is under control, it’s time to consider exercises to make sure the pain stays away. Understand your body’s muscular balance and how it works: Which muscles need to be strengthened and which need to be stretched? Which are overdeveloped or strained? A strong core includes whole body balance, not just the front abdominal wall. The guidance of a professional Pilates instructor, physical therapist, or movement therapist is highly recommended.  Ideas for low impact exercise can include:

walking

elliptical

swimming

pilates (with a certified instructor, preferably one with a rehabilitation background)

low impact aerobics

dance

…really, just get moving! Finding an enjoyable form of exercise is key to lasting strength. Regular activity, with balanced trunk strength, prevents back pain from recurring, allowing you to stay mobile and strong for many years to come.

ACL Pre/Post Surgery Knee Exercises

Torn ACLs and knee injuries are surprisingly common, and a prime example of how muscular imbalances create wear on the joints. Proper awareness, balance, and strength training are key to preventing and rehabbing any and all injuries… knees included.

For a knee injury, it is important to build the entire leg: maintain quad strength, build stronger hamstrings, and focus on balanced strength in the hips. Pay attention to proper traction and alignment of the ankle, knee and hip as you exercise – in other words, make sure everything is lining up. You can easily do a movement, but without proper alignment of the joints, muscular imbalances can be created, resulting in continued strain.   The best way to build overall strength and better alignment is to incorporate some form of balance into your exercises. Balancing coerces lesser developed muscles to engage, as well as to kick in a little core support.

Your doctor or PT will probably gave you some similar movements, like squats, leg presses, and lunges, but my recommendation would be to try to incorporate an element of balance with each:

Wall Squats with a balance ball behind the back – Angle out the legs and work your way to bringing them under your hips. Pay attention that the knee lines up with the center of your foot. Don’t let the knees extend into flexion past the toes, or a 90 degree angle. Hold the squat for 30 seconds.

Single leg wall squats – This is a challenge. Be careful with these.


Standing on one foot Hip hikes
– Using a yoga block, encourage balance work on the standing leg. allow the opposing leg to tap the floor and lift up. Works the hips and standing leg stability.


Balance on one foot
– Balance on an upside down bosu ball, foam roller, or a wobble board at the gym
Practice balance on this for 30 seconds to 2 minutes at a time.


Lunges with bosu ball – You can flip the bosu either way.  Arm movements are optional.  Here’s an alternative with the Bosu Ball flipped.

Swimming over balance ball – Lying over the ball. Core is centered. Opposing hand and leg lift, other two remain in contact with the floor. Hold for 5-10 seconds each. Keep both arm and leg completely straight, hold and balance. Switch.

Hamstring curl, pelvic lift series on balance ball or bosu ball – Lying on the floor. Soles of the feet flat on the ball (don’t hang in just heels), curl hips up towards the ceiling and roll back down through the spine. Keep ball stable. Can do with legs together (harder) or shoulder width apart. Curl up and down 10 – 20 times.
1. Next progression: you can keep hips elevated and carefully push the ball out and in. Don’t move hips as you move legs. Be careful with this one.
2. Next progression: you can do single leg pelvis lifts, with opposing leg stretched upward towards the ceiling – again, be careful with this one.

Leg presses on the gym equip. Don’t just power through. Keep body aligned and lengthen spine and low back away from the leg movement.


Foam Roller IT band massage If you have a foam roller at the gym, you might want to roll out the outside of the leg. Actually, investing in a roller for home is a wise purchase. There are a multitude of uses and benefits. Rolling out the IT band can be painful, depending on how tense is. The roller helps release hip and leg tension, while reducing strain on the knee.